Let’s talk about Fiber - Vaults
Posted: February 21, 2025

Understanding Vault Assemblies
What's Hiding Underground? The Mystery of Telecommunication Vaults Revealed
Ever wonder how those cables bring internet and phone service to your home and stay safe underground? The answer lies in telecommunication vaults. They are hidden fortresses protecting the vital wires that keep us connected. You’ve often walked by them or even stepped on a few and never noticed them.
These sturdy boxes, sometimes called handholes, are buried beneath our feet, shielding delicate cables and equipment from damage. Unlike those green boxes you see on poles, vaults are safe from cars, lawnmowers, and even pedestrians. They protect our communication lines and keep our streets looking tidy.
Unlike above-ground pedestals vulnerable to impacts from vehicles, lawnmowers, snowplows, and even pedestrians with a flair for soccer, vaults offer below-grade protection. This subterranean placement enhances network security and improves the environment's aesthetics.
Built with robust, weather-resistant materials, these enclosures are designed for longevity, provided they are correctly rated for their intended location.
Choosing the Right Vault: A Quick Guide
With various vault options available, selecting the right one for your needs can be challenging. To simplify your decision-making process, consider these key features:
1. Construction
Before diving into the materials used in vault construction, it's important to understand the basic components. Most vaults consist of two main parts:
- The Lid: Typically installed level with the grade for easy access.
- The Vault Body: Installed below grade to house and protect the network components.
Vaults and lids may be sold separately, allowing for customization and flexibility. The lid and body can also be made from different materials to suit specific needs.
|
Common Vault Materials |
|
| Polymer Concrete: The gold standard in vault construction, polymer concrete provides exceptional strength, durability, and fire resistance. This makes it ideal for areas prone to brush fires or controlled burns. Its high density also prevents it from floating in flood-prone areas. However, concrete vaults are heavier and require more labor for installation. | 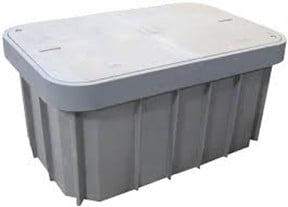 |
| HDPE (High-Density Polyethylene): A lightweight and cost-effective alternative to polymer concrete, HDPE vaults are suitable for various applications, from light to heavy-duty. Their lightweight simplifies installation, eliminating the need for heavy machinery. However, HDPE has a lower density than water, making it susceptible to floating. To address this, many HDPE vaults incorporate design features like flared bottoms or ribbed sidewalls to ensure stability in the ground. They can also be combined with concrete polymer or SMC lids for strength and stability. HDPE vaults are not fire-resistant. | 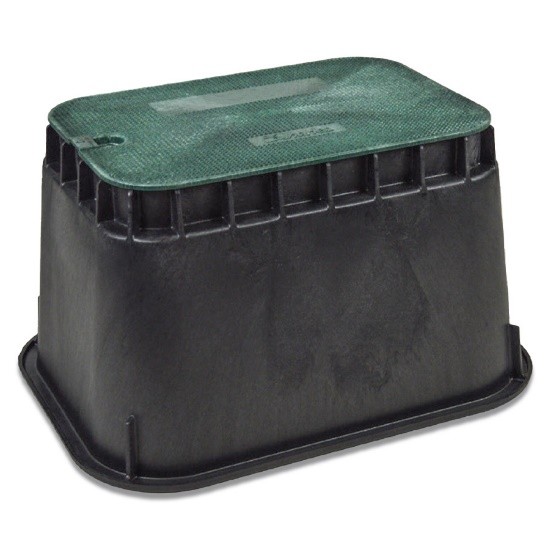 |
| SMC (Sheet Molding Compound): SMC vaults offer a high strength-to-weight ratio, cost-effectiveness, excellent impact resistance, and good corrosion resistance. While not as lightweight as HDPE, they are denser than water, making them suitable for areas with limited flooding potential. Some manufacturers use SMC lids on HDPE bodies to improve load rating and durability. SMC is often molded with fiberglass reinforcement to enhance strength and prevent shattering under extreme conditions. However, SMC is not a fire retardant. | 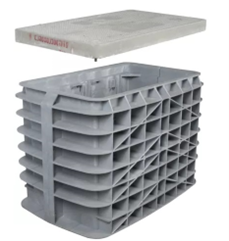 |
| Fiberglass: Another lightweight alternative to polymer concrete, fiberglass vaults are often designed with a flared base to prevent movement in high water conditions. These vaults are frequently combined with concrete lids for superior load ratings and durability. | 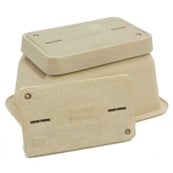 |
2. Load Rating and Tier Classification
Load rating is a crucial factor to consider when selecting an underground enclosure. It refers to the weight the enclosure can withstand without sustaining damage. Load ratings are typically verified by tier ratings specified in the ANSI-SCTE 77 standard. This standard outlines the performance specifications for non-deliberate traffic applications, meaning areas where vehicular traffic is not intended but may occur occasionally.
Here is a breakdown of the different tier ratings:
- Light Duty: Designed for pedestrian traffic only. This is suitable for grassy areas in residential properties located away from vehicular traffic.
- Tier 5: Intended for sidewalk applications with a safety factor for occasional non-deliberate vehicular traffic. For example, a residential sidewalk that is not crossed by a driveway (5,000 lbs. rating).
- Tier 8: Suitable for most public sidewalks where non-deliberate vehicular traffic is more common (8,000 lbs. rating).
- Tier 15: Designed for driveways, parking lots, and off-roadway applications subject to occasional non-deliberate heavy vehicular traffic. This might include sidewalks in residential or public areas where heavy vehicles are unlikely but possible (15,000 lbs. rating).
- Tier 22: Like Tier 15, but with a higher load rating of 22,000 lbs. (about the weight of a school bus). This is appropriate for non-paved medians between divided highways or non-paved shoulder areas.
- AASHTO H-20: This rating applies to deliberate vehicular traffic applications, such as streets, highways, and paved shoulders. Only certified precast concrete, cast iron, or AASHTO-recognized materials can be used for these applications.
Choosing the Right Tier Rating
Understanding the different tier ratings is essential for selecting the proper enclosure and optimizing costs. While it might seem tempting to choose the highest load rating, this can be unnecessarily expensive. Higher tier ratings come with a higher price. Therefore, it's crucial to specify the appropriate enclosure for the intended application.
3. Installation
Proper site preparation is essential for successful vault installation. Here's a breakdown of the key steps:
Choose the Right Spot:
- Carefully select your installation site, ensuring it is clear of any underground utilities, pipes, or cables.
- Mark the area clearly to avoid any accidental damage during excavation.
Digging the Hole:
- Excavate an area slightly larger than the vault (about 12-16 inches wider and 8-12 inches deeper). This extra space is crucial for:
- Adding a gravel base for stability and drainage.
- Providing room for backfilling around the vault.
Building a Solid Foundation:
- Create a level base using 3-6 inches of gravel or crushed rock. This "gravel bed" serves several important purposes:
- Prevents the vault from settling or shifting over time.
- Ensures proper drainage around the vault, protecting it from water damage.
- Provides a stable and supportive foundation.
4. Making Life Easier for Technicians
Accessing underground vaults for customer drop connections can be a real headache for installation technicians. Imagine digging down 30 inches through gravel to connect a single cable! This takes time, disrupts the surrounding area, and requires careful restoration. Multiply that effort by the number of homes connected to each vault, and the inefficiency becomes clear.
Some technicians resort to drilling through the vault walls, but this can weaken the structure and cause problems if the vault needs to be moved later (for example, due to road construction).
There is a better way! Technicians can easily feed drop cables without deep digging by running a small, empty duct (like a pipe) from the vault to a small access point like a flowerpot or irrigation box near the surface. This simple solution saves considerable time and effort, especially in networks where each vault serves multiple customers.
Previous Post
WAV Expands Product Offerings with Ubiquiti
WAV announces distribution agreement with Ubiquiti, a global leader in high-performance enterprise networking, wireless ISP, security, and surveill...

